THIS GUIDE IS NON FUNCTIONAL SO FAR, EXPECT MANY UPDATES.
I’m posting the WIP so a) I don’t have to re-format it later on, b) anyone who might want to provide feedback can do so as I go. I will remove this header and make a post below when it’s complete.
“No, it wasn’t an accident, I didn’t say that. It was carefully planned, down to the tiniest mechanical and emotional detail. But it was a mistake.” - John Paxton, On the Beach
So you wish to tame the most volatile machine this cursed game has to offer? Well look no further. This guide imparts the knowledge I have on running the Hypertorus Fusion Reaction (HFR) while minimising risk. It is not intended to be understood in one readthrough; my personal recommendation is to digest it in combination with practical in-game experience.
The scope of this guide covers: what the HFR is and why it’s useful, how to build it, how it works, a basic setup, its settings, how to operate it, basic example of operation and how to prevent a delamination. Afterwards, I will give an advanced setup and demonstrate how to make stun immunity internals with it.
Crucial prerequesite atmospherics knowledge includes understandings of basic gas properties, the RPD and devices it creates, the atmospherics layout and space cooling loops. Knowing how to acquire BZ will be necessary later on but is not crucial for understanding the machine. Jed’s lovely atmos guide will be sufficient, with a little practical in-game experience.
You will make mistakes. Possibly disastrous ones. However, as the saying goes, you can’t make an omlette without cracking a few stations.
Feel free to ping me via @drac in the #Atmospherics thread of #ask-mentors on fulpcord with any questions or suggestions as to how I can improve this guide.
WAT IS HFR AND WHY DO I NEED IT
Simply put, the HFR is a machine that turns gases into other, sometimes more desirable, gases. For example nitrium, a useful and valuable (100cr/mol) gas, which requires tritium, bz and nitrogen to make normally, only requires oxygen and plasma when made with the HFR and this is via a much faster process.
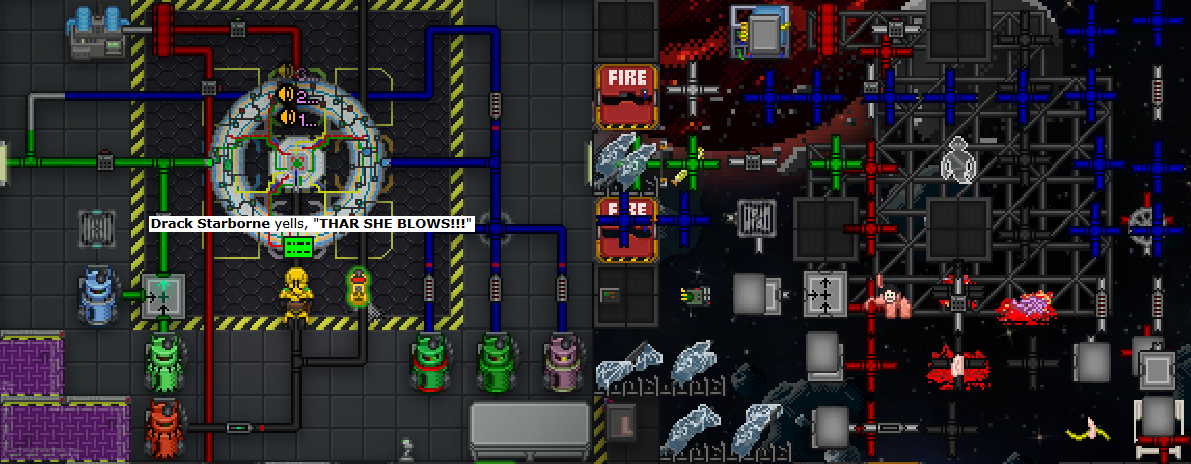
It is, however, a fusion reactor which is precisely as dangerous as it sounds. Similar to the SM, it has health represented in-game via percentage integrity. Once this integrity reaches 0%, the resultant explosion can be anywhere between nonexistant for fusion level 0, to catastrophic at fusion level 6, additionally EMPing up to the entire z-level depending on the tier of fuel used. As you can imagine, this might not make you the most popular person on station should it come to fruition.
>pic of post-trit/hn lvl6 explosion and the emp
>3 basic HFR setup diagrams with different configurations, one of them labelled
HOW 2 BUILD
The HFR is a 3x3 tile machine consisting of a core, four corners, fuel input, moderator input, output and interface. The core and corners are fixed but the other parts can be exchanged for different configurations as indicated in the diagram above.
The HFR can be built via printing boards and creating machines, or via pre-fabricated “boxes”. This guide covers the latter method of construction since these boxes are found in the HFR room and the other method is simple enough.
>4 diagrams, left side with boxes, then post multitool, then switched on, then with burning instructions
Simply arrange the “boxes” in a 3x3 grid; core in the centre, corners in the corners and the other parts where you’d like them to be. Once done, multitool the core and finish by multitooling the interface. The most critical step is to burn the instructions that spawn. They are not very useful.
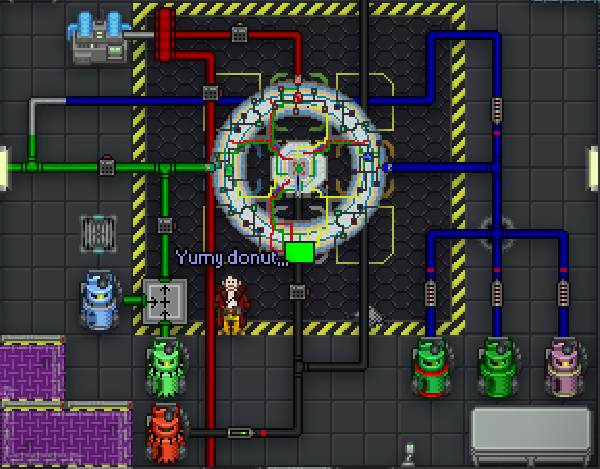
>picture of basic HFR setup, labelled
HOW IT WORK
The HFR contains three separate gas mixtures: the fusion mix, the moderator and coolant. It also has an output for produced gases.
>green fuel input on HFR alongisde FUSION LEVEL diagram alongside fuel chart from HFR
The fusion mix contains fuel, taken in via the green fuel port. As this fuel burns, the fusion mix’s temperature changes, affecting the fusion level as indicated in [DIAGRAM LABEL]. Each different fuel used will produce different gases at different fusion levels in addition to byproducts as indicated in [DIAGRAM LABEL]. For example, at fusion level 4, plasma/oxy fuel will produce [???] as well as h2o and co2 as byproducts. All produced gases and byproducts are sent to the output, or sometimes the moderator.
Fuel should be inputted at a 50/50 ratio. There should NEVER EVER EVER be more than 10,000 moles of fuel in the machine else it will NEAR INSTANTLY drop to 0% integrity. In addition to producing different gases, each fuel has different properties as indicated on the right of [DIAGRAM LABEL]. These are explaned via mouse hovering over them ingame.
>blue moderator input on HFR alongside moderator monitor in HFR itself
The moderator is a gas mixture that affects the reaction in various ways, taken in via the blue moderator port. The three production moderators are plasma, bz and proto-nitrate; when present in the moderator mix, they produce desirable gases. For example, any fusion level 4 reaction with bz present in the moderator produces healium and proto-nitrate, two very useful gases. Different moderators also affect how quickly the fusion mix heats up; plasma will cause the reaction to heat faster, while freon will slow it down, or possibly even cool it. Some moderators have special effects; healium in the moderator can increase integrity, ie. heal the HFR, in certain circumstances. This page details the effects of certain moderators with more depth and this page details moderator effects on the fusion mix (rule of thumb is that positive numbers in the chart means more fusion mix heat, negative numbers the opposite). Sometimes produced gases end up in the moderator and can be filtered into the output.
>diagram of coolant input with coolant monitor alongside
The coolant, taken in via the core’s port, works to cool both the fusion mix and moderator. My recommendation is for a space loop with plasma, since it has a high heat capacity, or hyper-noblium for more dangerous fuels, since it has an even higher heat capacity. Separating the space loop from the coolant port via a valve (see diagram) is wise since you sometimes don’t want coolant connected at all, eg. when you want the fusion mix to heat up.
>diagram of output with bluespace sender adjacent
The output is produced gases ejected from the output port. These gases are usually at extreme pressures and temperatures, requiring a very robust coolant system. However, we cheat and use the bluespace gas sender, which sucks gases in and sets them to room temperature.
BASIC SETUP
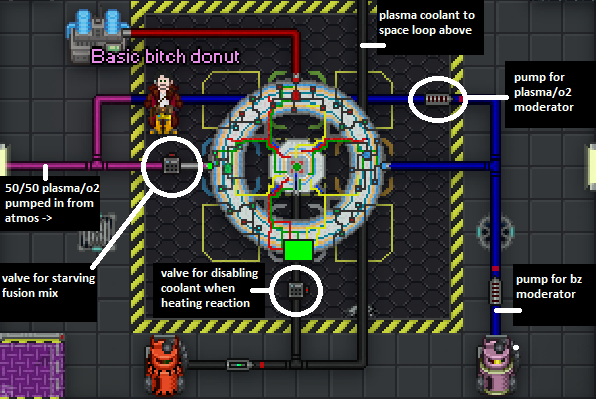
For basic HFR operation, I use the setup above. A 50/50 plasma / oxygen mix is pumped through the left-hand pink pipe. A digital valve leading to the fuel port allows us to starve the fusion mix in an emergency, preventing new fuel from entering. If desired, the plasma / oxygen can also flow into the moderator port via a gas pump. This means we don’t have to pipe plasma or oxygen directly into the moderator, saving us time. Bz can also be pumped into the moderator, once you’ve acquired it anyway. The black pipes contain coolant, in this case plasma, which is cooled via a decently sized space loop offscreen. Since the HFR’s cooling cannot be turned off once it’s operational, it’s useful to be able to block coolant; this is done via another digital valve.
TOO MANY SETTINGS, HELP AAAA

Clicking on the green interface will open the HFR control panel; a daunting plethora of dials and buttons. Fear not as everything will be explained in detail. If any feature’s explanation seems inpregnable, try playing around with the setting in-game then come back.
more to come